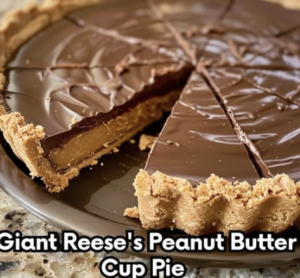
Giant Reese’s Peanut Butter Cup Pie 🥧🍫🥜
Dive into this decadent Giant Reese’s Peanut Butter Cup Pie, where rich chocolate ganache meets a chunky peanut butter filling. A perfect dessert for peanut butter lovers and chocolate aficionados alike!
Ingredients:
Chocolate Ganache:
- 2½ cups milk chocolate chips
- 1½ tablespoons vegetable oil
Chunky Peanut Butter Filling:
- 1⅓ cups powdered sugar
- 1 cup graham cracker crumbs
- 1¼ cups crunchy peanut butter
- ½ cup salted sweet cream butter, softened
Instructions:
- Prep the Tart Pan:
- Line a 9-inch fluted tart pan with parchment paper and lightly coat with nonstick spray.
- Make the Ganache:
- Combine chocolate chips and vegetable oil in a microwave-safe bowl. Heat for 45-55 seconds, then stir until smooth.
- Spread half of the ganache evenly over the bottom and up the sides of the prepared tart pan. Refrigerate until firm, about 20 minutes.
- Prepare the Peanut Butter Filling:
- In a large bowl, combine the powdered sugar, graham cracker crumbs, crunchy peanut butter, and softened butter. Mix until well combined and smooth.
- Assemble the Pie:
- Once the ganache layer is firm, press the peanut butter mixture evenly over the chocolate layer in the tart pan.
- Pour the remaining ganache over the peanut butter layer, spreading it evenly to cover the top completely.
- Chill:
- Refrigerate the pie for at least 2 hours, or until fully set.
- Serve:
- Remove the pie from the tart pan and transfer to a serving plate. Slice and serve chilled. Enjoy your Giant Reese’s Peanut Butter Cup Pie!
Secrets to Achieve the Perfect Giant Reese’s Peanut Butter Cup Pie:
- Quality Ingredients: Use high-quality chocolate chips and peanut butter for the best flavor.
- Smooth Ganache: Stir the ganache until completely smooth for a glossy, even finish.
- Consistent Crumbs: Ensure the graham cracker crumbs are finely ground for a smooth filling.
- Balanced Sweetness: Adjust the powdered sugar to taste if you prefer a less sweet filling.
- Room Temperature Butter: Use softened butter to easily mix the filling ingredients.
- Even Layers: Press the peanut butter filling evenly for a uniform layer.
- Firm Ganache: Allow the first ganache layer to fully firm up in the fridge before adding the peanut butter filling.
- Sturdy Tart Pan: Use a sturdy tart pan to support the pie’s weight.
- Parchment Paper: Line the tart pan with parchment paper for easy removal.
- Cooling Time: Chill the pie thoroughly before serving to allow the layers to set.
- Microwave Caution: Heat the chocolate chips in short bursts to avoid burning.
- Ganache Smoothness: Use a spatula to spread the ganache smoothly.
- Firm Press: Firmly press the peanut butter mixture into the tart pan to avoid gaps.
- Even Coverage: Spread the final ganache layer evenly to cover the peanut butter completely.
- Chill Time: Refrigerate longer if necessary to ensure the pie is fully set.
- Serving Temperature: Serve chilled or slightly cool for the best texture.
- Clean Slices: Use a sharp knife for clean slices, wiping between cuts if needed.
- Storage: Store leftovers in the refrigerator to keep the pie fresh.
- Decoration: Optionally, decorate the top with crushed peanuts or chocolate shavings for added texture.
- Enjoyment: Allow the pie to come to room temperature for a few minutes before serving for the best flavor.
20 Most Popular Questions and Their Answers:
- Can I use dark chocolate chips instead of milk chocolate chips?
- Yes, dark chocolate can be used for a richer flavor.
- Can I use smooth peanut butter instead of crunchy?
- Yes, smooth peanut butter will work but the texture will be slightly different.
- How long can I store the pie?
- The pie can be stored in the refrigerator for up to one week.
- Can I freeze the pie?
- Yes, you can freeze the pie. Thaw it in the refrigerator before serving.
- What can I use instead of graham cracker crumbs?
- Crushed digestive biscuits or vanilla wafer cookies are good substitutes.
- Can I make this pie without a tart pan?
- Yes, you can use a regular pie dish, but a tart pan makes it easier to remove.
- Is vegetable oil necessary for the ganache?
- The oil helps to smooth the ganache, but you can use coconut oil as an alternative.
- Can I add toppings to the pie?
- Yes, toppings like crushed peanuts, chocolate chips, or whipped cream can be added.
- What if my ganache is too thick?
- If too thick, gently reheat and add a small amount of cream or milk to loosen it.
- Can I use salted butter instead of unsalted?
- Yes, but adjust the salt in the recipe accordingly to taste.
- What if my ganache is too runny?
- Allow it to cool slightly before spreading, or add more chocolate chips.
- How can I make the pie less sweet?
- Reduce the amount of powdered sugar in the peanut butter filling.
- Can I use homemade peanut butter?
- Yes, but ensure it’s not too oily or runny for the filling to set properly.
- What if my pie doesn’t set?
- Ensure proper chilling time and that the ganache layers are firm before serving.
- Can I use a different type of chocolate?
- Yes, white or semi-sweet chocolate can be used for variation.
- Can I add flavors to the ganache?
- Yes, you can add a teaspoon of vanilla or a splash of liqueur for extra flavor.
- Do I need to refrigerate the pie after each layer?
- Chilling each layer helps it set better, but it’s not strictly necessary.
- How can I make the pie vegan?
- Use dairy-free chocolate chips, vegan butter, and a dairy-free cream substitute.
- Can I use a pre-made crust?
- Yes, a store-bought crust can save time, but homemade offers better flavor.
- How do I prevent the ganache from cracking?
- Ensure even cooling and avoid rapid temperature changes when setting the ganache.
Enjoy creating and indulging in this delightful Giant Reese’s Peanut Butter Cup Pie!