Ingredients:
- 1 box vanilla or white cake mix
- 2 sticks butter (melted and divided)
- 3 eggs
- 1 tsp vanilla extract
- 1 block (8 oz) cream cheese
- 3 cups powdered sugar
- Optional toppings: powdered sugar, whipped cream, chocolate sauce
Instructions:
- Preheat your oven to 350°F (175°C). Grease a 9×9-inch baking pan with non-stick cooking spray or butter.
- Prepare Cake Base:
- In a large mixing bowl or using a mixer, combine the vanilla or white cake mix, 1 egg, and 1 stick of melted butter.
- Mix until thoroughly combined.
- Press this mixture evenly into the bottom of the prepared pan.
- Prepare Cream Cheese Layer:
- In the same bowl (no need to clean it), add the cream cheese and mix until smooth.
- Add the remaining 2 eggs and vanilla extract, mixing until well combined.
- Gradually add the powdered sugar, one cup at a time, mixing thoroughly after each addition.
- Assemble and Bake:
- Pour the cream cheese mixture over the cake base in the pan.
- Spread it evenly with a spatula.
- Bake:
- Bake in the preheated oven for approximately 45 minutes.
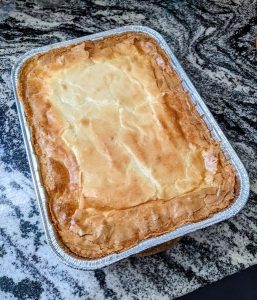
- The cake should be set around the edges but still slightly “jiggly” in the center. It will continue to set as it cools.
- Cooling:
- Allow the cake to cool completely in the pan. It’s important to resist the temptation to cut into it while warm.
- Cutting into Bars:
- Once completely cooled, cut the cake into small bars.
- Due to its richness, smaller portions are recommended.
- Optional Toppings and Serving:
- Feel free to get creative with toppings like a dusting of powdered sugar, a dollop of whipped cream, or a drizzle of chocolate sauce.
- Serve and enjoy these delicious Ooey Gooey Bars with your favorite toppings, and savor the rich, gooey texture!
Note: The inside of the bars will have a gooey, almost raw appearance, but that’s part of the charm of this dessert. Trust the process, and you’ll be rewarded with a decadent treat!