No-Bake Christmas Lush
“The kind of holiday dessert Mama made the night before Christmas — silky, cool, creamy, and always the first pan to disappear.”
There’s something comforting about a no-bake dessert during the holidays. When the kitchen is already overflowing with roasting pans, cookie trays, and bubbling gravy pots, this no-bake Christmas lush feels like a small holiday miracle.
It’s colorful.
It’s creamy.
It’s fully make-ahead.
And every layer tastes like pure Christmas cheer.
With a buttery cookie crust, a sweet cloud of cream cheese, a pudding layer as smooth as silk, and snowy whipped topping sprinkled with Christmas magic… this dessert has been part of family gatherings for generations. It’s nostalgic, joyful, and impossible not to love.
🎁 Ingredient Overview
⭐ Crust
-
Graham crackers or vanilla cookies — provide a buttery base that softens perfectly as it chills.
-
Melted butter — binds the crust and gives the lush its signature richness.
⭐ Cream Cheese Layer
-
Cream cheese — gives structure and tang to balance sweetness.
-
Powdered sugar — keeps texture smooth and velvety.
-
Vanilla — adds warmth.
-
Cool Whip — makes the layer cloud-soft and airy.
⭐ Pudding Layer
-
Instant white chocolate or vanilla pudding — the silky heart of the dessert.
-
Cold milk — activates the pudding without the need for heat.
-
Peppermint extract (optional) — transforms it into a peppermint lush.
-
Food coloring — red and green for that beautiful layered Christmas look.
⭐ Top Layer
-
Cool Whip — like a snowy blanket on top.
-
Christmas sprinkles or crushed peppermint — makes the dessert festive and irresistible.
🍰 Step-by-Step Instructions
⭐ Step 1 — Prepare the Crust
Mix crushed cookies with melted butter.
Press firmly into a 9×13 dish.
Refrigerate while preparing the next layer.
⭐ Step 2 — Make the Cream Cheese Layer
Beat:
-
Cream cheese
-
Powdered sugar
-
Vanilla
Mix until smooth and creamy.
Fold in Cool Whip gently.
Spread over the chilled crust.
⭐ Step 3 — Prepare the Pudding Layer
Whisk pudding mix with cold milk until thickened.
(Optional) Add a drop of red or green gel food coloring.
Spread pudding gently over the cream cheese layer.
⭐ Step 4 — Add the Top Layer
Spread Cool Whip across the top like a snowy layer.
Decorate with sprinkles or crushed peppermint.
⭐ Step 5 — Chill & Serve
Refrigerate at least 4 hours, or overnight for the cleanest slices.
Serve chilled and enjoy this creamy Christmas classic.
❓ 20 Frequently Asked Questions
1. Can I use a different cookie for the crust?
Yes — Oreos, ginger snaps, shortbread, or Nilla wafers all work.
2. Can I use homemade whipped cream?
You can, but Cool Whip holds its shape better for layering.
3. Can I make this sugar-free?
Yes — use sugar-free pudding and sugar-free Cool Whip.
4. Does this freeze well?
It freezes beautifully — especially for make-ahead desserts.
5. How long can it stay in the fridge?
Up to 4–5 days.
6. Can I make this in a trifle dish?
Yes — it looks gorgeous layered vertically.
7. Can I tint the layers different colors?
Absolutely — red, white, and green look stunning.
8. Can I use chocolate pudding instead?
Yes — it becomes a Christmas chocolate lush.
9. Can I skip the crust?
Yes — make it crustless for a softer dessert.
10. Can I add peppermint candies?
Yes — mix crushed peppermint into the top layer.
11. Can I use cream cheese spread instead of block cream cheese?
No — the spread is too soft.
12. Can I add fruit?
Yes — cherries or strawberries work well on top.
13. Why did my layers mix together?
Your pudding wasn’t thick enough. Let it sit longer before spreading.
14. Can I lighten this dessert?
Use low-fat cream cheese and light whipped topping.
15. Can this be served with a spoon instead of slicing?
Yes — especially if made in a trifle dish.
16. What if my crust crumbles?
Add a little more melted butter to bind it.
17. Can kids help make this?
Absolutely — they’ll love sprinkling the top.
18. Can I add cocoa to the cream cheese layer?
Yes — it becomes a chocolate layer lush.
19. Can I double the recipe?
Yes — use a deeper dish or two pans.
20. Is this safe to sit out at a party?
Yes — up to 2–3 hours, but best served chilled.
💡 20 Helpful Tips
1. Use gel food coloring — liquid makes layers too runny.
2. Chill crust before adding filling for clean layers.
3. Make sure the cream cheese is fully softened.
4. Use cold milk — instant pudding won’t set with warm milk.
5. Spread each layer gently to avoid mixing.
6. Let pudding sit 5 minutes before spreading.
7. Add sprinkles right before serving to avoid color bleeding.
8. For a chocolate version, use Oreo crust + chocolate pudding.
9. Want extra richness? Add ½ cup sour cream to the cream cheese layer.
10. Want peppermint? Replace vanilla with peppermint extract.
11. Use crushed pretzels for a sweet-salty crust.
12. Add marshmallow fluff to the top layer for extra sweetness.
13. Double the Cool Whip for a thicker “snow” topping.
14. Add toasted coconut for texture.
15. Decorate with chocolate curls for elegance.
16. Want firmer slices? Add ¼ cup less milk to pudding.
17. Refrigerate overnight for best results.
18. Use a hot knife to slice cleanly.
19. Serve in Christmas cupcake liners for portion control.
20. Add extra pudding on top for a triple-lush effect.
🧊 10 Storage Tips
-
Store covered in fridge up to 4–5 days.
-
Keep sprinkles separate until serving.
-
Freeze slices individually for easy serving.
-
Freeze whole pan tightly wrapped in plastic + foil.
-
Thaw in fridge overnight before serving.
-
Avoid leaving uncovered in the fridge — it absorbs smells.
-
Do not store in warm areas — layers soften.
-
Use airtight container for freshness.
-
If transporting, keep chilled with cold packs.
-
Add final decorations after thawing for best color.
🔐 20 Recipe Secrets
-
Use white chocolate pudding for the creamiest results.
-
Add ½ cup marshmallow cream to the cream cheese layer for extra silkiness.
-
Mix ½ cup powdered sugar into the Cool Whip for stability.
-
Use shortbread cookies for a richer crust.
-
Dip crust in melted butter + cinnamon for extra flavor.
-
Add a thin drizzle of chocolate between layers.
-
Tint each layer a different color for a layered Christmas look.
-
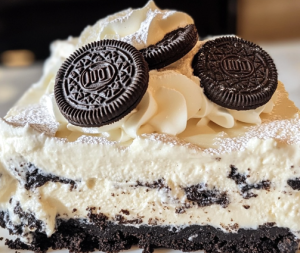
Add crushed Oreos on top for texture.
-
Fold Cool Whip gently to keep mixture airy.
-
Make two pans — this dessert disappears fast.
-
Add a splash of Irish cream for an adult version.
-
Sprinkle chopped Andes mints on top.
-
Add gelatin to pudding for ultra-firm layers.
-
Decorate with piped whipped cream swirls.
-
Use peppermint bark as topping.
-
Add toasted pecans for crunch.
-
Add crushed pretzels for sweet-salty flavor.
-
Use a trifle bowl for dramatic presentation.
-
Chill the serving plates for extra cold slices.
-
Wrap leftovers tight — it tastes better the next day!