Mini Blooming Onions Recipe

Mini Blooming Onions Recipe

Ingredients:

  • 4 small yellow onions
  • 2 cups buttermilk
  • 2 cups all-purpose flour
  • 1 teaspoon smoked paprika
  • 1 teaspoon garlic powder
  • 1 teaspoon onion powder
  • 1/2 teaspoon cayenne pepper
  • Salt and pepper, to taste
  • Vegetable oil, for frying

Directions:

  1. Prepare the Onions:
    • Peel the onions and trim off the tops. Place each onion on a cutting board and make several vertical cuts into each onion, stopping about 1/4 inch from the bottom. The cuts should go almost to the bottom but not all the way through, creating a “blooming” effect.
  2. Soak the Onions:
    • Place the prepared onions in a bowl and pour buttermilk over them, ensuring they are fully submerged. Let them soak for at least 1 hour in the refrigerator. This helps to soften the onions and enhances the flavor.
  3. Prepare the Coating:
    • In a separate bowl, combine the all-purpose flour, smoked paprika, garlic powder, onion powder, cayenne pepper, salt, and pepper. Mix well to evenly distribute the spices.
  4. Heat the Oil:
    • In a large pot or deep fryer, heat vegetable oil to 375°F (190°C). Use enough oil to submerge the onions completely.
  5. Coat the Onions:
    • Remove the onions from the buttermilk, allowing any excess to drip off. Dredge each onion in the seasoned flour mixture, ensuring all sides and the inside cuts are thoroughly coated. Gently shake off any excess flour.
  6. Fry the Onions:
    • Carefully lower the coated onions into the hot oil, one at a time. Fry them in batches if necessary, depending on the size of your pot. Fry until the onions are golden brown and crispy, about 5-7 minutes, turning occasionally to ensure even cooking.
  7. Drain and Serve:
    • Once the onions are cooked to a golden crisp, use a slotted spoon to remove them from the oil. Drain on paper towels to remove excess oil.
  8. Serve Warm:
    • Serve the Mini Bloomin’ Onions immediately while they are still hot and crispy. You can accompany them with your favorite dipping sauce such as ranch dressing, spicy mayo, or a tangy barbecue sauce.

Tips:

  • Ensure the oil is hot enough (375°F/190°C) before frying to achieve a crispy texture.
  • Handle the onions gently when coating and frying to maintain the blooming shape.
  • Adjust the seasoning to your preference by adding more or less cayenne pepper for spiciness or smoked paprika for a deeper flavor.

These Mini Bloomin’ Onions are perfect as a fun and delicious appetizer or snack, guaranteed to impress your guests with their crispy exterior and tender onion layers inside. Enjoy!

Here are some helpful tips to make your Mini Bloomin’ Onions even more delightful and irresistible:

  1. Uniform Cutting:
    • When making the vertical cuts into the onions, ensure they are evenly spaced and go almost to the bottom but not all the way through. This helps the onion to “bloom” evenly when fried.
  2. Soaking in Buttermilk:
    • For extra flavor and tenderness, extend the soaking time in buttermilk to 2 hours or more. This allows the buttermilk to penetrate deeper into the onion layers, enhancing their flavor and texture.
  3. Double Coating for Extra Crispiness:
    • For an even crispier coating, double-dip the onions in the seasoned flour mixture after the initial coating. After the first dredge in flour, dip the onion back into the buttermilk and then coat it again with flour before frying.
  4. Seasoning Variations:
    • Experiment with different seasonings in the flour mixture to customize the flavor of your Mini Bloomin’ Onions. Add a pinch of smoked paprika, cajun seasoning, or even grated Parmesan cheese to the flour mixture for added depth of flavor.
  5. Frying Technique:
    • Maintain the oil temperature at around 375°F (190°C) throughout the frying process. This ensures that the onions cook evenly and achieve a golden-brown crispy exterior without absorbing too much oil.
  6. Draining Excess Oil:
    • After frying, place the Mini Bloomin’ Onions on a wire rack set over a baking sheet or on paper towels to drain excess oil. This helps to keep them crispy and prevents them from becoming soggy.
  7. Serve with Dipping Sauces:
    • Pair your Mini Bloomin’ Onions with a variety of dipping sauces such as ranch dressing, honey mustard, chipotle aioli, or a tangy barbecue sauce. The dipping sauces enhance the flavor and add a complementary element to the crispy onions.
  8. Garnish Creatively:
    • Before serving, garnish the Mini Bloomin’ Onions with a sprinkle of finely chopped fresh herbs like parsley or chives. This adds a pop of color and freshness to the dish, making it visually appealing.
  9. Serve Immediately:
    • Mini Bloomin’ Onions are best served hot and fresh out of the fryer to maintain their crispiness. Serve them immediately after frying for the ultimate enjoyment.
  10. Make Ahead Option:
    • If preparing ahead, you can partially fry the Mini Bloomin’ Onions until they are lightly golden, then finish frying them just before serving to ensure they are hot and crispy.

By incorporating these tips, you’ll elevate your Mini Bloomin’ Onions to a new level of deliciousness, making them a standout appetizer or snack for any occasion!

To achieve the perfect Mini Bloomin’ Onions, here are some secrets and tips to keep in mind:

  1. Choose the Right Onions:
    • Opt for small to medium-sized yellow onions for Mini Bloomin’ Onions. They should be firm and fresh to ensure they hold their shape well during frying.
  2. Even and Deep Cuts:
    • Make sure to cut the onions with even and deep vertical cuts. These cuts should be close together but not all the way through the onion to allow it to “bloom” nicely when fried.
  3. Proper Soaking in Buttermilk:
    • Soak the onions in buttermilk for at least 1-2 hours, or even overnight if possible. This not only adds flavor but also helps to tenderize the onions, making them softer and more enjoyable to eat.
  4. Seasoning the Flour Mixture:
    • Spice up your flour mixture beyond the basic seasonings. Consider adding a pinch of smoked paprika, cayenne pepper, or even a dash of your favorite hot sauce to the flour mixture for added flavor and a hint of heat.
  5. Double Coating Technique:
    • For an extra crispy coating, double-dip the onions in the seasoned flour mixture. After the first dredge, dip the onion back into the buttermilk and then coat it again with flour before frying. This double coating ensures a crunchy exterior.
  6. Maintain Oil Temperature:
    • Heat the vegetable oil to around 375°F (190°C) and maintain this temperature consistently while frying. This high temperature ensures that the onions cook quickly and evenly, resulting in a crispy texture without becoming greasy.
  7. Drain Excess Oil:
    • After frying, drain the Mini Bloomin’ Onions on a wire rack set over a baking sheet or on paper towels to remove excess oil. This step helps to preserve the crispiness of the onions.
  8. Serve Immediately:
    • Mini Bloomin’ Onions are best served immediately after frying while they are hot and crispy. Delaying serving can cause them to lose their crunchiness.
  9. Pair with Dipping Sauces:
    • Serve your Mini Bloomin’ Onions with a variety of dipping sauces such as ranch dressing, honey mustard, or a tangy barbecue sauce. These sauces complement the crispy texture and add extra flavor.
  10. Experiment with Garnishes:
    • Before serving, garnish the Mini Bloomin’ Onions with finely chopped fresh herbs like parsley or chives. This adds a touch of freshness and visual appeal to the dish.

By following these secrets and tips, you’ll be able to create Mini Bloomin’ Onions that are crispy, flavorful, and perfect for any occasion. Enjoy your delicious appetizer with friends and family!

Here are  popular questions and their answers related to Mini Bloomin’ Onions:

  1. What are Mini Bloomin’ Onions?
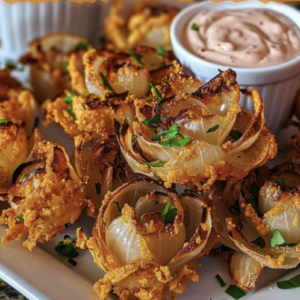
    • Mini Bloomin’ Onions are small-sized onions that are cut to bloom into a flower-like shape, then coated in seasoned flour and deep-fried until crispy.
  2. How do you cut Mini Bloomin’ Onions?
    • To cut Mini Bloomin’ Onions, start by peeling the onion and trimming the root end. Make vertical cuts around the onion, stopping about 1/4 inch from the bottom, creating a “bloom” effect.
  3. Can I use different types of onions for Mini Bloomin’ Onions?
    • While yellow onions are traditional, you can also use sweet onions or red onions for a different flavor profile in Mini Bloomin’ Onions.
  4. What does soaking onions in buttermilk do?
    • Soaking onions in buttermilk helps to tenderize them and adds flavor before coating and frying. It also helps the flour mixture adhere better to the onions.
  5. How long should you soak Mini Bloomin’ Onions in buttermilk?
    • Soak Mini Bloomin’ Onions in buttermilk for at least 1 hour, or up to overnight in the refrigerator for maximum flavor and tenderness.
  6. What is the best oil for frying Mini Bloomin’ Onions?
    • Vegetable oil or canola oil are good choices for frying Mini Bloomin’ Onions due to their neutral flavor and high smoke point.
  7. How hot should the oil be for frying Mini Bloomin’ Onions?
    • Heat the oil to around 375°F (190°C) for frying Mini Bloomin’ Onions. This high temperature ensures they cook quickly and achieve a crispy texture.
  8. How do you make Mini Bloomin’ Onions without buttermilk?
    • If you don’t have buttermilk, you can substitute with regular milk mixed with a tablespoon of vinegar or lemon juice. Let it sit for 5-10 minutes before using.
  9. Can you bake Mini Bloomin’ Onions instead of frying?
    • While frying gives the best texture, you can bake Mini Bloomin’ Onions at 400°F (200°C) on a baking sheet lined with parchment paper until golden and crispy, though the texture may differ slightly.
  10. How do you reheat Mini Bloomin’ Onions?
    • To reheat Mini Bloomin’ Onions, place them on a baking sheet and bake in a preheated oven at 350°F (175°C) for about 10 minutes until heated through and crispy.
  11. How do you store leftover Mini Bloomin’ Onions?
    • Store leftover Mini Bloomin’ Onions in an airtight container in the refrigerator. Reheat them in the oven to maintain their crispiness.
  12. What sauces go well with Mini Bloomin’ Onions?
    • Mini Bloomin’ Onions pair well with dipping sauces such as ranch dressing, honey mustard, spicy mayo, or a tangy barbecue sauce.
  13. Can you freeze Mini Bloomin’ Onions?
    • It’s not recommended to freeze Mini Bloomin’ Onions as they may become soggy upon thawing.
  14. How do you prevent Mini Bloomin’ Onions from getting greasy?
    • Ensure the oil is hot enough before frying and avoid overcrowding the pot. Drain the Mini Bloomin’ Onions on paper towels after frying to remove excess oil.
  15. What seasonings can you add to Mini Bloomin’ Onions?
    • You can add various seasonings to the flour mixture such as smoked paprika, garlic powder, onion powder, cayenne pepper, or even grated Parmesan cheese for added flavor.
  16. Can you make Mini Bloomin’ Onions ahead of time?
    • You can prepare Mini Bloomin’ Onions up to the point of frying ahead of time. Store them in the refrigerator and fry just before serving to ensure they are hot and crispy.
  17. How do you serve Mini Bloomin’ Onions?
    • Serve Mini Bloomin’ Onions hot and crispy as an appetizer or snack, accompanied by your favorite dipping sauces.
  18. Are Mini Bloomin’ Onions gluten-free?
    • Mini Bloomin’ Onions are not typically gluten-free as they are coated in flour. However, you can use gluten-free flour and ensure all other ingredients are gluten-free for a gluten-free version.
  19. How do you make Mini Bloomin’ Onions crispy?
    • To make Mini Bloomin’ Onions crispy, ensure the oil is hot enough before frying, and use a double coating of seasoned flour for a crunchy exterior.
  20. Can you air fry Mini Bloomin’ Onions?
    • Yes, you can air fry Mini Bloomin’ Onions by spraying them with oil and cooking them in an air fryer at 400°F (200°C) for about 15-20 minutes, turning halfway through.
  21. How many calories are in Mini Bloomin’ Onions?
    • The calorie count can vary depending on size and ingredients used, but generally, Mini Bloomin’ Onions are a higher calorie snack due to frying. Each onion can range from 200-300 calories or more.
  22. Are Mini Bloomin’ Onions spicy?
    • Mini Bloomin’ Onions can be made spicy by adding cayenne pepper or other hot spices to the flour mixture. Adjust the amount of spice according to your preference.
  23. How do you make Mini Bloomin’ Onions without deep frying?
    • You can try baking or air frying Mini Bloomin’ Onions for a healthier alternative to deep frying, though the texture may be slightly different.
  24. Can you make Mini Bloomin’ Onions with pre-cut onions?
    • While pre-cut onions may save time, they may not bloom as effectively. It’s best to cut fresh onions for Mini Bloomin’ Onions for the best presentation.
  25. How do you clean up after frying Mini Bloomin’ Onions?
    • Allow the oil to cool completely, then strain it through a fine mesh sieve into a container for reuse or disposal. Clean the pot or fryer with hot, soapy water.
  26. Can you make Mini Bloomin’ Onions in an electric skillet?
    • Yes, you can make Mini Bloomin’ Onions in an electric skillet. Heat oil to 375°F (190°C) and fry as you would in a regular pot or deep fryer.
  27. How do you know when Mini Bloomin’ Onions are done frying?
    • Mini Bloomin’ Onions are done frying when they are golden brown and crispy. This usually takes about 5-7 minutes depending on the size and thickness of the onions.
  28. Can you use a different type of flour for Mini Bloomin’ Onions?
    • Yes, you can use alternative flours such as whole wheat flour or gluten-free flour blends for Mini Bloomin’ Onions, adjusting the seasonings as needed.
  29. How do you keep Mini Bloomin’ Onions warm for serving?
    • Keep Mini Bloomin’ Onions warm in a low oven (200°F/93°C) on a baking sheet lined with parchment paper until ready to serve.
  30. Are Mini Bloomin’ Onions vegan?
    • Mini Bloomin’ Onions are not vegan as they are coated in buttermilk and flour. However, you can use plant-based milk and a vegan egg substitute for a vegan version.
  31. How do you make Mini Bloomin’ Onions without dairy?
    • Substitute dairy-free alternatives such as almond milk or soy milk for buttermilk in Mini Bloomin’ Onions.
  32. Can you make Mini Bloomin’ Onions in an air fryer?
    • Yes, you can make Mini Bloomin’ Onions in an air fryer for a healthier version. Follow the same preparation steps and cook at 400°F (200°C) for about 15-20 minutes, turning halfway through.
  33. How do you make Mini Bloomin’ Onions less greasy?
    • Ensure the oil is hot enough before frying, and drain Mini Bloomin’ Onions on paper towels after frying to remove excess oil.
  34. What size onions are best for Mini Bloomin’ Onions?
    • Small to medium-sized onions are best for Mini Bloomin’ Onions to ensure they bloom nicely without being too large.
  35. How do you make Mini Bloomin’ Onions kid-friendly?
    • Adjust the seasonings to be milder and serve Mini Bloomin’ Onions with kid-friendly dipping sauces such as ketchup or a mild ranch dressing.
  36. Are Mini Bloomin’ Onions difficult to make?
    • Mini Bloomin’ Onions require some preparation and frying skills but are not overly difficult with proper instructions and technique.
  37. How do you make Mini Bloomin’ Onions without eggs?
    • Substitute eggs with a mixture of 1/4 cup of water and 1 tablespoon of cornstarch or a commercial egg replacer for coating Mini Bloomin’ Onions.
  38. Can you make Mini Bloomin’ Onions with frozen onions?
    • It’s best to use fresh onions for Mini Bloomin’ Onions as frozen onions may not bloom properly when cut.
  39. Can you make Mini Bloomin’ Onions with pre-cooked onions?
    • Pre-cooked onions may not hold their shape well for Mini Bloomin’ Onions.
SAVE IT FOR LATER IN PINTEREST