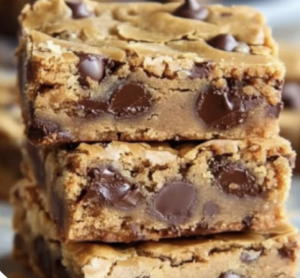
peanut butter cookie bars
Ingredients:
- 2 1/2 cups all-purpose flour
- 1/2 teaspoon baking soda
- 1/2 teaspoon baking powder
- 1/2 teaspoon salt
- 1/2 cup unsalted butter, softened
- 1/2 cup granulated sugar
- 1/2 cup packed brown sugar
- 1 large egg
- 1 teaspoon vanilla extract
- 4 oz cream cheese, softened
- 1 cup mini Reese’s Pieces
- 1/2 cup Reese’s Peanut Butter Cups, chopped
- 1/2 cup white chocolate chips
- 1/2 cup semi-sweet chocolate chips, melted (for drizzling)
Instructions:
- Preheat Oven: Preheat the oven to 350°F (175°C) and line a baking sheet with parchment paper.
- Mix Dry Ingredients: In a medium bowl, whisk together the flour, baking soda, baking powder, and salt.
- Cream Butter and Sugars: In a large bowl, cream together the butter, granulated sugar, and brown sugar until light and fluffy.
- Combine Wet Ingredients: Beat in the egg and vanilla extract until combined. Add the softened cream cheese and mix until smooth.
- Combine Mixtures: Gradually add the dry ingredients to the wet ingredients, mixing until just combined.
- Fold in Add-ins: Gently fold in the mini Reese’s Pieces, chopped Reese’s Peanut Butter Cups, and white chocolate chips.
- Shape Cookies: Scoop the dough onto the prepared baking sheet, about 2 tablespoons per cookie, and slightly flatten each one.
- Bake: Bake for 10-12 minutes, or until the edges are lightly golden.
- Cool Cookies: Allow cookies to cool on the baking sheet for 5 minutes before transferring to a wire rack to cool completely.
- Drizzle Chocolate: Drizzle the cooled cookies with melted semi-sweet chocolate.
Creating the perfect Gooey Reese’s Cheesecake Cookies involves careful attention to detail and mastering specific techniques. Here are 30 secrets to help you achieve cookie perfection:
Preparation and Ingredients
- Use Quality Ingredients: Opt for high-quality butter, cream cheese, and Reese’s products to ensure rich flavors.
- Room Temperature Ingredients: Ensure butter, cream cheese, and eggs are at room temperature for easier mixing and a smoother dough.
- Proper Measuring: Measure ingredients accurately using a kitchen scale for precision.
- Fresh Baking Powder and Soda: Make sure your leavening agents are fresh for optimal rise and texture.
- Full-Fat Cream Cheese: Full-fat cream cheese provides the best texture and flavor for the cheesecake filling.
- Balanced Sweetness: Taste and adjust the sugar in both the dough and filling to your preference.
Dough Preparation
- Cream Butter and Sugar: Beat the butter and sugar together until light and fluffy to create a good base for your cookies.
- Don’t Overmix: Once you add the dry ingredients, mix just until combined to avoid tough cookies.
- Chill the Dough: Refrigerate the dough for at least an hour before baking to prevent spreading and ensure thick, chewy cookies.
- Use a Cookie Scoop: For uniform-sized cookies, use a cookie scoop to portion the dough.
- Flatten the Dough Balls: Slightly flatten the dough balls before baking to encourage even spreading.
Cheesecake Filling
- Chill the Filling: Chill the cheesecake filling before using it to make stuffing the cookies easier.
- Stuffing Technique: Use a small spoon to create an indentation in the dough balls and fill with cheesecake mixture before sealing.
- Seal Well: Ensure the dough completely encloses the cheesecake filling to prevent it from leaking out during baking.
Baking
- Parchment Paper or Silicone Mats: Line baking sheets with parchment paper or silicone baking mats to prevent sticking and promote even baking.
- Proper Spacing: Space dough balls at least 2 inches apart on the baking sheet to allow for spreading.
- Preheat the Oven: Ensure the oven is fully preheated to the correct temperature before baking.
- Oven Thermometer: Use an oven thermometer to verify your oven’s temperature is accurate.
- Bake in the Center: Position the baking sheet in the center of the oven for even heat distribution.
- Watch the Bake Time: Bake cookies until edges are set but centers are still soft for a gooey texture.
- Cool on Baking Sheet: Let cookies cool on the baking sheet for a few minutes before transferring to a wire rack.
Enhancements and Variations
- Reese’s Chunks: Incorporate chopped Reese’s cups or mini Reese’s pieces into the dough for bursts of peanut butter flavor.
- Mix-In Variations: Experiment with different mix-ins like chocolate chips, peanut butter chips, or crushed pretzels.
- Add Sea Salt: Sprinkle a tiny pinch of sea salt on top of each cookie before baking to enhance the flavors.
- Double Batch: Make a double batch of dough and freeze half for future cravings.
Storage and Serving
- Freeze Extras: Freeze unbaked dough balls for later use, baking them straight from the freezer with an extra minute or two of bake time.
- Store Properly: Store baked cookies in an airtight container to maintain freshness.
- Reheat for Gooeyness: Reheat cookies in the microwave for a few seconds to bring back the gooey texture if they’ve cooled too much.
Troubleshooting and Tips
- Avoid Overbaking: Underbake slightly for a gooey, soft center.
- Test Bake: Bake a single cookie as a test batch to perfect the baking time and temperature for your oven.
By paying attention to these details and techniques, you’ll be able to create the perfect Gooey Reese’s Cheesecake Cookies every time, delighting everyone with their gooey centers and rich flavors.
Popular Questions and Their Answers Related to Gooey Reese’s Cheesecake Cookies
- Can I use regular Reese’s Pieces instead of mini?
- Yes, you can use regular Reese’s Pieces, but mini ones distribute more evenly in the dough.
- Can I use light cream cheese instead of regular?
- Light cream cheese can be used, but it might slightly alter the texture.
- How do I store these cookies?
- Store the cookies in an airtight container at room temperature for up to 5 days.
- Can I freeze the dough?
- Yes, you can freeze the cookie dough for up to 3 months. Thaw in the refrigerator before baking.
- Can I use peanut butter instead of cream cheese?
- Cream cheese is essential for the cheesecake flavor, but you can add a bit of peanut butter for extra flavor.
- What can I use instead of Reese’s Peanut Butter Cups?
- You can substitute with other chocolate candies or chopped chocolate bars.
- Can I omit the white chocolate chips?
- Yes, you can omit the white chocolate chips if you prefer.
- How do I ensure the cookies stay gooey?
- Avoid overbaking. The cookies should be slightly underbaked in the center.
- Can I add nuts to the recipe?
- Yes, chopped nuts like walnuts or pecans can be added for extra crunch.
- How do I soften cream cheese quickly?
- Microwave the cream cheese for 10-15 seconds to soften it quickly.
- Can I use margarine instead of butter?
- Butter is preferred for flavor, but margarine can be used as a substitute.
- How many cookies does this recipe make?
- This recipe makes approximately 24 cookies.
- Can I make these cookies gluten-free?
- Use a gluten-free flour blend to make these cookies gluten-free.
- What kind of chocolate is best for drizzling?
- Semi-sweet chocolate chips or a good-quality dark chocolate are best for drizzling.
- Can I add cocoa powder to the dough?
- Yes, you can add a couple of tablespoons of cocoa powder for a chocolatey dough.
- Do I need to chill the dough before baking?
- Chilling is not necessary, but it can help the cookies hold their shape better.
- Can I make these cookies without a mixer?
- Yes, you can mix the ingredients by hand, but ensure the butter and cream cheese are well softened.
- What if I don’t have parchment paper?
- You can use a silicone baking mat or lightly grease the baking sheet.
- Can I use dark brown sugar instead of light?
- Yes, dark brown sugar can be used for a richer flavor.
- How do I know when the cookies are done?
- The edges should be lightly golden, and the centers should still be soft.